It’s that spooky time of year again when the leaves turn crisp, and the air fills with the aroma of pumpkin spice lattes. What better way to celebrate Halloween than with a treat that combines all the delightful chaos of candy and chocolate into one delicious bite? Enter the Halloween Rocky Road Treat—a confection that’s as colorful as a bag of mixed Halloween candies and as satisfying as finding an extra cookie in the bottom of the jar. spooky Yeball Cookie Cups Witch Hat Appetizers.
Ah, Rocky Road! It brings back memories of childhood sleepovers filled with ghost stories, laughter, and enough sweets to fuel a sugar rush that could power a small city. This recipe is not just for enjoying on Halloween but any occasion where you want to indulge your sweet tooth or impress friends with your culinary prowess. delicious Ghost Screaming Donuts Trust me; your tastebuds will be doing the Monster Mash with every bite!
Why You'll Love This Recipe
- This Halloween Rocky Road Treat is incredibly easy to whip up, requiring no baking at all.
- The combination of chocolate, marshmallows, and nuts creates a flavor explosion that will leave you craving more.
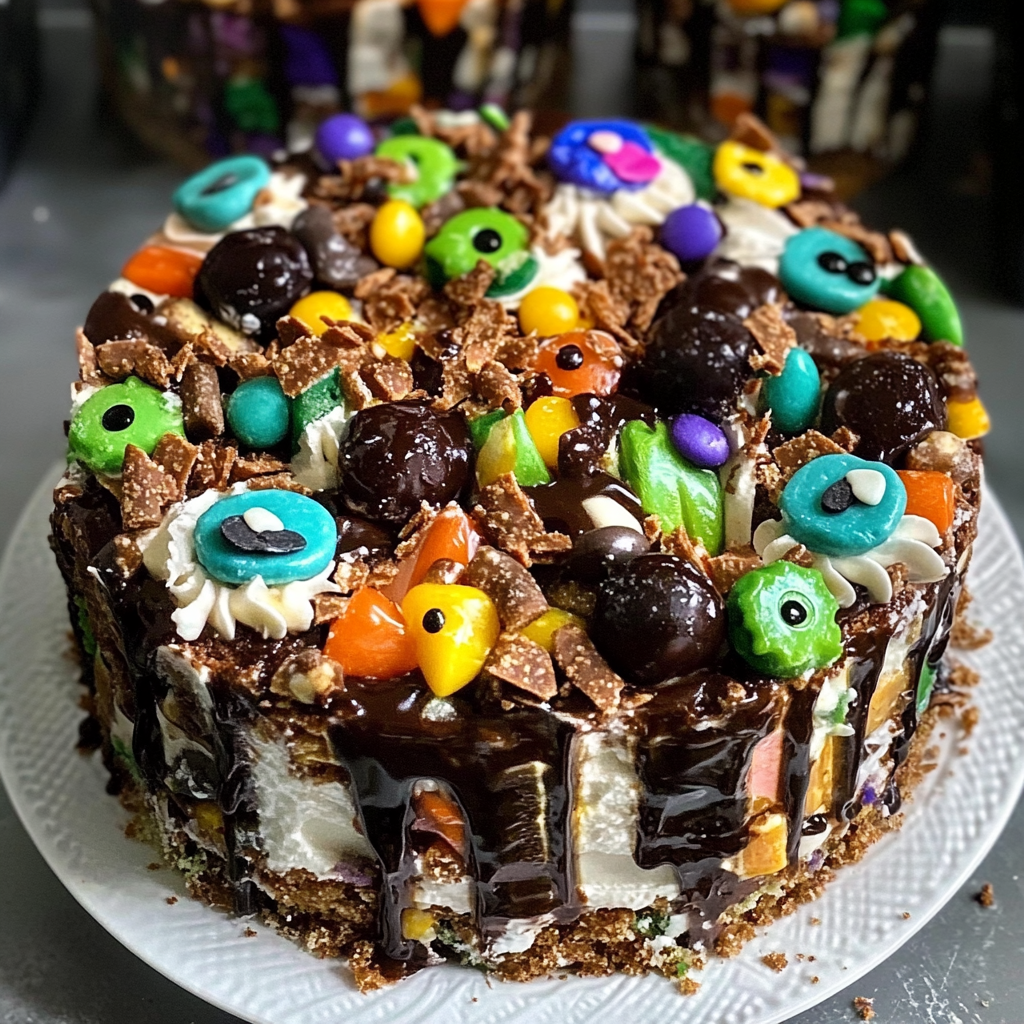
- Its vibrant colors make it visually striking, perfect for party platters or fun family gatherings.
- Plus, it’s versatile enough to throw in whatever candy leftovers you have after trick-or-treating!
Ingredients for Halloween Rocky Road Treat
Here’s what you’ll need to make this delicious dish:
- Chocolate Chips: Semi-sweet chocolate chips are ideal for melting and provide a rich base flavor.
- Mini Marshmallows: These little fluff balls add sweetness and a soft texture that makes every bite delightful.
- Chopped Nuts: Walnuts or almonds work great here; they add a nice crunch and balance the sweetness.
- Candy Corn: A classic Halloween treat that adds color and sweetness; feel free to swap it out if you prefer other candies.
- Butter: Use unsalted butter for melting with chocolate; it helps create that creamy texture we all love.
- Vanilla Extract: A splash of vanilla enhances the overall flavor profile; it’s like the cherry on top!
The full ingredients list, including measurements, is provided in the recipe card directly below.
How to Make Halloween Rocky Road Treat
Follow these simple steps to prepare this delicious dish:
Step 1: Prepare Your Workspace
Start by gathering all your ingredients and tools like a mixing bowl, spatula, and an appropriate-sized baking dish lined with parchment paper.
Step 2: Melt Chocolate
In a microwave-safe bowl, combine chocolate chips and butter. Heat in intervals of 30 seconds until melted and smooth. Stir frequently to avoid burning.
Step 3: Mix Ingredients
Once melted, remove from microwave and stir in vanilla extract. Add mini marshmallows, chopped nuts, and candy corn into the melted chocolate mixture. Fold gently until everything is well combined.
Step 4: Transfer to Baking Dish
Pour the mixture into your lined baking dish. Use your spatula to spread it evenly across the surface. You want every inch covered in chocolaty goodness!
Step 5: Chill
Refrigerate for about two hours or until set firmly. This step is crucial unless you enjoy gooey fingers!
Step 6: Slice & Serve
Once set, lift out using the parchment paper edges. Cut into squares or rectangles depending on how much trouble you’re willing to get into when stealing them from each other’s plates!
Now all that’s left is to gather your friends around for some spooky fun while enjoying these scrumptious treats! Whether you’re watching horror movies or sharing ghost stories around a bonfire, these Halloween Rocky Road Treats are sure to be a hit!
You Must Know
- Halloween Rocky Road Treats are the perfect spooky dessert for your fall festivities.
- With their delightful crunch and gooey chocolate, they’ll make you the hit of any Halloween bash.
- These treats are easy to whip up, making them a frightfully fun addition to your holiday traditions.
Perfecting the Cooking Process
Start by melting the chocolate and butter together in a bowl over simmering water. While that’s happening, prepare your mix-ins like marshmallows and nuts. Once melted, stir in the goodies and pour into a lined pan. Chill until set, then cut into squares.
Add Your Touch
Feel free to swap out almonds for peanuts or add in some crushed Oreo cookies for an extra layer of flavor. You can also sprinkle spooky edible glitter on top for that Halloween flair. Get creative with flavors; it’s Halloween after all! For more inspiration, check out this delicious Easter cookies recipe.
Storing & Reheating
Store your Halloween Rocky Road Treats in an airtight container at room temperature for up to a week. If you need to reheat, pop them in the microwave for just a few seconds to soften the chocolate without melting everything.
Chef's Helpful Tips
- Always use high-quality chocolate for richer flavor; it makes all the difference in this recipe.
- Ensure your mix-ins are evenly distributed for consistent bites throughout the treat.
- Let them chill completely before cutting; otherwise, you’ll end up with a delicious mess!
It reminds me of the time I made these treats for my niece’s Halloween party. The look on her face when she saw them was priceless—it truly captured the spirit of Halloween!
FAQs :
What ingredients do I need for Halloween Rocky Road Treat?
To make Halloween Rocky Road Treat, gather essential ingredients such as chocolate (milk or dark), mini marshmallows, crushed biscuits (like digestive or graham crackers), and assorted nuts. For a festive touch, consider adding Halloween-themed candies like gummy worms or candy corn. perfect Halloween appetizer You can also include dried fruits for added texture and flavor. This combination creates a deliciously chewy and crunchy treat perfect for the spooky season.
How long does it take to prepare Halloween Rocky Road Treat?
Preparing Halloween Rocky Road Treat is quick and easy. The preparation time typically takes about 20 minutes, while chilling in the refrigerator will take around 1 to 2 hours. So, overall, you can enjoy these delightful treats in less than three hours from start to finish. This makes them an excellent last-minute addition to your Halloween festivities or parties.
Can I customize my Halloween Rocky Road Treat?
Absolutely! The beauty of Halloween Rocky Road Treat lies in its versatility. Feel free to swap out ingredients based on your preferences. You can use different types of chocolate, add various nuts, or even incorporate seeds for a healthier twist. Additionally, try adding seasonal flavors like pumpkin spice for a unique autumn taste that complements the holiday theme perfectly.
How should I store Halloween Rocky Road Treat?
Store your Halloween Rocky Road Treat in an airtight container at room temperature for up to a week. If you want to keep them fresh for longer, refrigerate them where they can last up to two weeks. Just remember to allow them to come back to room temperature before serving, as this will enhance their chewy texture and rich flavors.
Conclusion for Halloween Rocky Road Treat :
In summary, making Halloween Rocky Road Treat is an enjoyable and straightforward process that brings festive fun to any gathering. With simple ingredients and endless customization options, you can create a unique treat that delights both kids and adults alike. Whether you’re preparing these treats for a party or simply enjoying them at home, they are sure to become a seasonal favorite. Embrace the spirit of Halloween with this delicious recipe!

Halloween Rocky Road Treat
- Total Time: 20 minutes
- Yield: Approximately 12 servings 1x
Description
Halloween Rocky Road Treats are the ultimate no-bake dessert for your spooky celebrations! Combining rich chocolate, fluffy marshmallows, and crunchy nuts, these delightful treats are colorful, customizable, and perfect for Halloween parties or cozy family gatherings. Easy to prepare in just a few steps, they will impress both kids and adults alike. Get ready to indulge in a festive sweet that captures the spirit of the season!
Ingredients
- 2 cups semi-sweet chocolate chips
- 1/4 cup unsalted butter
- 2 tsp vanilla extract
- 3 cups mini marshmallows
- 1 cup chopped walnuts or almonds
- 1 cup candy corn
Instructions
- Prepare Your Workspace: Gather all ingredients and tools—mixing bowl, spatula, and lined baking dish.
- Melt Chocolate: In a microwave-safe bowl, combine chocolate chips and butter. Heat in 30-second intervals until smooth, stirring frequently.
- Mix Ingredients: Stir in vanilla extract. Add mini marshmallows, chopped nuts, and candy corn; fold gently until combined.
- Transfer to Baking Dish: Pour mixture into the lined baking dish, spreading evenly with a spatula.
- Chill: Refrigerate for about 2 hours or until firmly set.
- Slice & Serve: Lift out using parchment paper edges and cut into squares.
- Prep Time: 20 minutes
- Cook Time: 0 minutes
- Category: Dessert
- Method: No-bake
- Cuisine: American
Nutrition
- Serving Size: 1 serving
- Calories: 180
- Sugar: 14g
- Sodium: 50mg
- Fat: 10g
- Saturated Fat: 4g
- Unsaturated Fat: 6g
- Trans Fat: 0g
- Carbohydrates: 21g
- Fiber: 1g
- Protein: 2g
- Cholesterol: 5mg