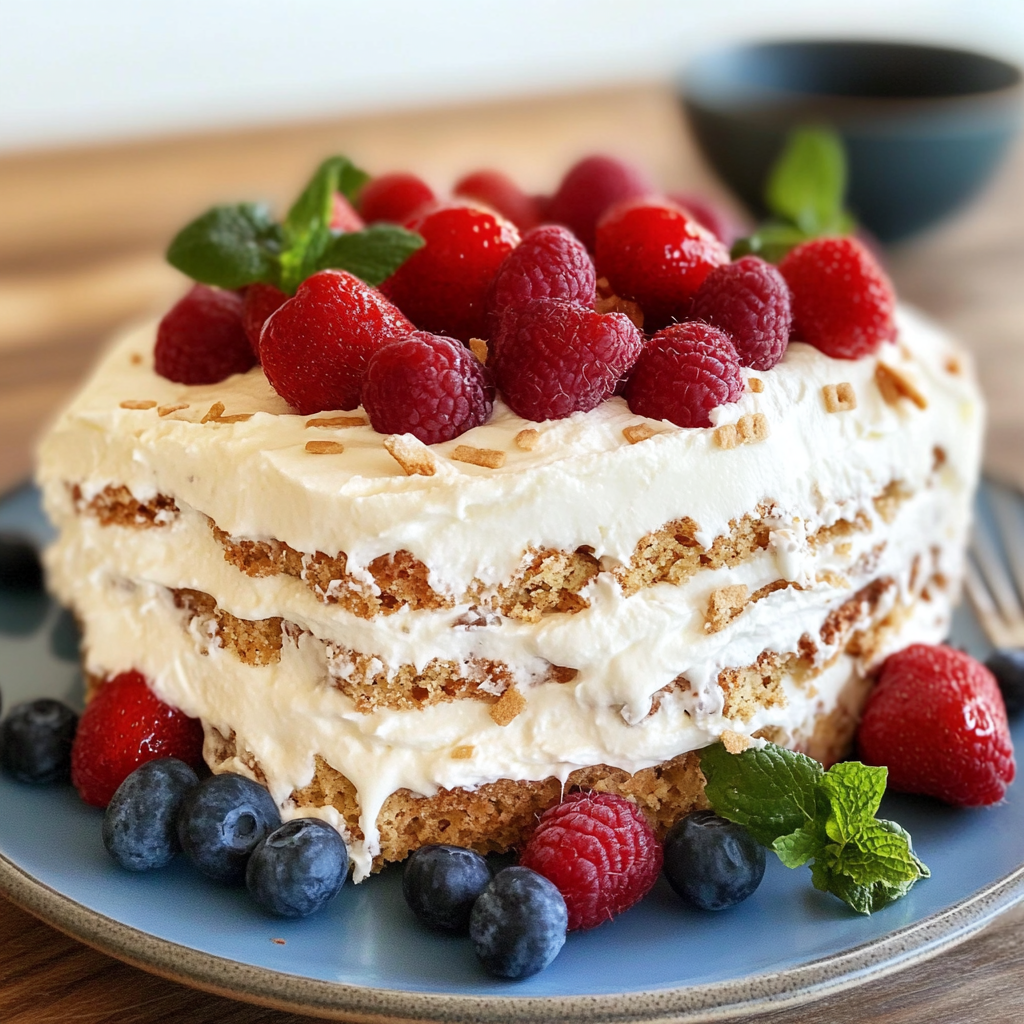
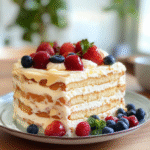
The moment you take a bite of Vanilla Wafer Icebox Cake, you’re transported to a world where creamy sweetness and crunchy wafer goodness collide in the most delightful way. Imagine layers of fluffy whipped cream mingling with delicate vanilla wafers, creating a symphony of textures that dance on your palate like a joyful ballet. This cake is not just a dessert; it’s a celebration waiting to happen.
Now, if you’re anything like me, you might have memories of hot summer days spent at Grandma’s house, where Vanilla Wafer Icebox Cake reigned supreme. With each forkful, nostalgia floods back as if time traveled. Whether it’s a family gathering or just an afternoon snack, this cake is perfect for any occasion and promises flavors that will keep everyone coming back for more!
Why You'll Love This Recipe
- The Vanilla Wafer Icebox Cake requires minimal effort, making it perfect for busy days or last-minute gatherings.
- Its rich and creamy flavor profile will satisfy both kids and adults alike.
- Visually appealing with its layered look, it’s sure to be a showstopper at any event.
- This dessert is versatile enough to customize with different flavors or toppings based on your mood or season!
Ingredients for Vanilla Wafer Icebox Cake
Here’s what you’ll need to make this delicious dish:
- Vanilla Wafers: You’ll need about 2-3 boxes of vanilla wafers as they form the base layers of the cake.
- Heavy Whipping Cream: About 2 cups are required for that light and fluffy texture; ensure it’s chilled for easier whipping.
- Granulated Sugar: Use half a cup to sweeten the whipped cream perfectly without overpowering the vanilla notes.
- Vanilla Extract: A tablespoon adds depth; opt for pure vanilla extract for the best flavor.
- Chocolate Shavings: Optional but highly recommended; they add a delightful crunch and visual appeal.
The full ingredients list, including measurements, is provided in the recipe card directly below.
How to Make Vanilla Wafer Icebox Cake
Follow these simple steps to prepare this delicious dish:
Step 1: Prepare Your Tools
Gather your mixing bowls, an electric mixer, and an 8×8 inch baking dish. It’s essential to have everything ready before diving into the fun part—mixing!
Step 2: Whip the Cream
In a large mixing bowl, pour in the heavy whipping cream. Add granulated sugar and vanilla extract. Using an electric mixer on medium speed, whip until soft peaks form—this should take about 3-5 minutes.
Step 3: Layer the Ingredients
Start by spreading a layer of whipped cream at the bottom of your baking dish. Then place a single layer of vanilla wafers over the whipped cream. Repeat layering until you’ve used all your ingredients, ending with whipped cream on top.
Step 4: Add Chocolate Shavings
If you’re feeling fancy (and who doesn’t want to feel fancy?), sprinkle chocolate shavings over the top layer of whipped cream for an extra touch of elegance.
Step 5: Chill Out
Cover your masterpiece with plastic wrap and pop it into the refrigerator. Allow it to chill for at least four hours—overnight is even better! This step lets those lovely layers meld together beautifully.
Step 6: Serve Up Some Happiness
Once chilled, slice into squares and serve! Watch as everyone digs in with smiles as big as their forks!
Transfer to plates and drizzle with chocolate syrup or garnish with fresh fruit if desired for that perfect finishing touch.
Now you have all the secrets to making a delightful Vanilla Wafer Icebox Cake that will impress friends and family alike! So go ahead—grab those ingredients—and let this easy yet delicious dessert become your new go-to treat!
You Must Know
- This delightful Vanilla Wafer Icebox Cake is not just a treat for the taste buds; it’s also a magical dessert that requires minimal effort.
- Layered with creamy goodness and crunchy wafers, it’s guaranteed to impress everyone at your next gathering.
Perfecting the Cooking Process
To achieve the best results, start by mixing your whipped cream and pudding together until smooth. While that sets for a moment, line your dish with vanilla wafers. Then, alternate layers of wafers and cream mixture until you reach the top.
Add Your Touch
Feel free to customize this icebox cake by adding fresh fruits like bananas or strawberries between the layers. You can also switch up the flavor by using chocolate pudding instead of vanilla for a twist. For more inspiration, check out this Ultimate Chocolate Cake Recipe recipe.
Storing & Reheating
Store any leftovers in an airtight container in the refrigerator for up to five days. There’s no need to reheat this cake; it’s best enjoyed chilled straight from the fridge.
Chef's Helpful Tips
- For a perfect icebox cake, make sure to let it chill for at least four hours before serving.
- This helps all the flavors meld beautifully.
- Always use heavy whipping cream for better stability in your whipped topping.
- And don’t rush – patience is key!
Sometimes I whip up this Vanilla Wafer Icebox Cake on a whim, and it never fails to bring smiles at family gatherings. My cousin once asked if I could make it every week—talk about pressure!
FAQs :
What is Vanilla Wafer Icebox Cake?
Vanilla Wafer Icebox Cake is a classic dessert that combines layers of creamy filling with vanilla wafers. The wafers soften as they absorb moisture from the filling, creating a delightful texture. This no-bake cake typically includes ingredients like whipped cream, cream cheese, and vanilla extract, making it a deliciously sweet treat perfect for any occasion. It’s easy to prepare and requires minimal effort, making it ideal for busy bakers or last-minute gatherings. For more inspiration, check out this Delicious Easter Cookies recipe.
How long does Vanilla Wafer Icebox Cake need to chill?
For the best results, Vanilla Wafer Icebox Cake should chill in the refrigerator for at least 4 to 6 hours. However, overnight chilling is recommended for optimal flavor and texture. The longer it sits, the softer the wafers become and the more the flavors meld together. cheesy ground beef pasta savory cheesy potato burritos For those who can wait, letting it sit overnight transforms this dessert into a truly delectable treat that everyone will love.
Can I use other types of cookies instead of vanilla wafers?
Yes! While vanilla wafers are traditional for this recipe, you can experiment with other cookies such as chocolate wafer cookies or even graham crackers. Each type offers a unique flavor and texture profile that can give your Vanilla Wafer Icebox Cake a creative twist. hearty chicken broccoli casserole Just be sure to adjust the filling flavors accordingly to complement your chosen cookie for a delicious outcome.
How do I store leftover Vanilla Wafer Icebox Cake?
Store any leftover Vanilla Wafer Icebox Cake in an airtight container in the refrigerator. It will keep well for up to 3 days. If you need to extend its freshness further, consider freezing it. Wrap individual slices tightly in plastic wrap and place them in a freezer-safe container for up to one month. Thaw slices in the refrigerator before serving to enjoy their creamy texture once again.
Conclusion for Vanilla Wafer Icebox Cake :
In summary, Vanilla Wafer Icebox Cake is an easy-to-make dessert that combines layers of soft vanilla wafers with creamy fillings. With simple ingredients and no baking required, it’s perfect for gatherings or potlucks. Allowing it to chill enhances its flavors and textures, making each bite irresistible. Whether you opt for traditional vanilla wafers or try other cookie varieties, this cake is sure to impress family and friends alike. Enjoying this delightful treat will leave everyone wanting more!
Vanilla Wafer Icebox Cake
- Total Time: 0 hours
- Yield: Serves approximately 8
Description
Vanilla Wafer Icebox Cake is a delightful no-bake dessert that combines layers of creamy whipped goodness with crunchy vanilla wafers, making it perfect for any occasion. Its rich flavors and beautiful presentation will impress family and friends, turning any gathering into a celebration. With just a few simple ingredients, this nostalgic treat is sure to bring smiles with every slice.
Ingredients
- 2–3 boxes vanilla wafers (about 12 oz total)
- 2 cups heavy whipping cream (chilled)
- ½ cup granulated sugar
- 1 tbsp pure vanilla extract
- Optional: chocolate shavings for garnish
Instructions
- Gather mixing bowls, an electric mixer, and an 8×8 inch baking dish.
- In a large bowl, whip the chilled heavy cream with sugar and vanilla extract until soft peaks form (about 3-5 minutes).
- Spread a layer of whipped cream at the bottom of the baking dish, followed by a layer of vanilla wafers. Repeat layers until all ingredients are used, finishing with whipped cream on top.
- Sprinkle optional chocolate shavings over the top layer.
- Cover with plastic wrap and refrigerate for at least four hours or overnight for best results.
- Slice into squares and serve chilled.
- Prep Time: 20 minutes
- Cook Time: None
- Category: Dessert
- Method: No-Bake
- Cuisine: American
Nutrition
- Serving Size: 1 slice (100g)
- Calories: 330
- Sugar: 22g
- Sodium: 50mg
- Fat: 25g
- Saturated Fat: 15g
- Unsaturated Fat: 10g
- Trans Fat: 0g
- Carbohydrates: 27g
- Fiber: <1g
- Protein: 2g
- Cholesterol: 80mg


0 thoughts on “Delightful Vanilla Wafer Icebox Cake Recipe to Try Today”